Main Menu
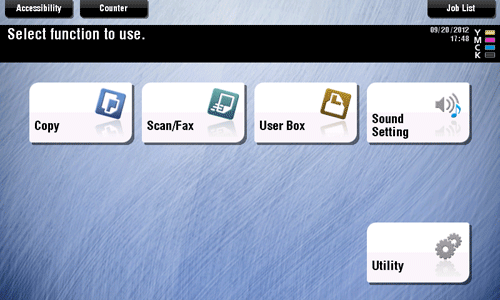
Displaying Main Menu
To display the main menu, tap [Menu] on the Control Panel. You can customize the keys to be displayed on the main menu freely to suit your requirements.
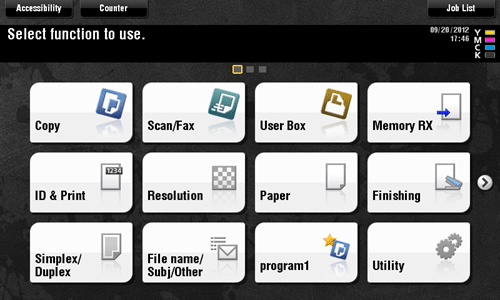
The main menu can be extended to three screens as necessary. It can show 12 shortcut keys in each screen, and up to 25 shortcut keys in three screens. [Utility] is displayed fixed on the lower right of the first page.
If shortcut keys of frequently-used functions are arranged on the main menu, it helps you quickly access a target function.
Furthermore, the background of the main menu can be changed according to your preference.
No. | Name | Description |
|---|---|---|
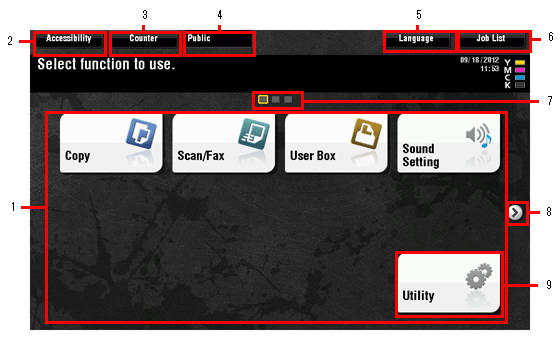
1 | Main menu keys | Display shortcut keys assigned to any function. Shortcut keys can be customized freely to suit your requirements. By default, [Copy], [Scan/Fax], [User Box], and [Sound Setting], and [Utility] are arranged on the main menu. ([Utility] is fixed.)
|
2 | [Accessibility] | Tap this button to adjust a Touch Panel pressing position, change keying sounds, and configure the operating environment of the Control Panel.
|
3 | [Counter] | Tap this button to display the total number of pages printed on this machine on a function or color basis.
|
4 | User/Account Name | Tap this button to display the name of the current login user or the account track name when User Authentication or Account Track is enabled. When User Authentication and Account Track are used together, the user name is displayed. |
5 | [Language] | Tap this button to temporarily change the language to be displayed on the panel.
|
6 | [Job List] | Tap this button to display current or standby jobs. If necessary, you can view job logs or print a communication report.
|
7 | Page Indicator | Allows you to check which page is currently displayed when main menu keys are assigned to multiple pages. |
8 | Page switching key | Tap this key to switch pages when main menu keys are assigned to multiple pages. Pages can also be switched by dragging or flicking the screen. |
9 | [Utility] | Tap this button to configure settings of this machine or view the use status of this machine.
|
Selecting functions to be arranged on the main menu (for the administrator)
Tap [Utility] - [Administrator Settings] - [System Settings] - [Custom Display Settings] - [Main Menu Default Settings].
Select a main menu key number to be assigned to a shortcut key.
[Main Menu Key 1] to [Main Menu Key 11] are assigned to the first screen of the main menu. It is useful that these keys are assigned to commonly-used functions.
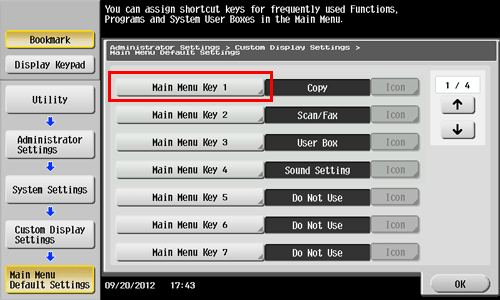
Tap [ON], select a function to be assigned to a shortcut key, then tap [OK].
Tap [Copy Program] or [Fax/Scan Program], and select Programs; you can arrange the programs registered on this machine on the main menu.
If Programs is selected, tap [Icon] in the screen shown in step 2, and select an icon to be displayed on the main menu.

The shortcut keys of the selected functions are arranged in the main menu.
Changing the theme of the main menu (for the administrator)
Tap [Utility] - [Administrator Settings] - [System Settings] - [Custom Display Settings] - [Main Menu Display Settings].
Select a desired theme, then tap [OK].
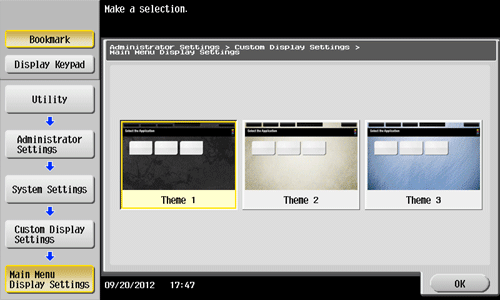
This changes the theme of the main menu to the selected one.